|
|
10 months ago | |
|---|---|---|
| .. | ||
| common | 10 months ago | |
| doc | 10 months ago | |
| samc21 | 10 months ago | |
| samd51-adafruit-metro-m4 | 10 months ago | |
| samd51-seeed-wio-terminal | 10 months ago | |
| same54 | 10 months ago | |
| same70 | 10 months ago | |
| saml10 | 10 months ago | |
| README.md | 10 months ago | |
README.md
Microchip BSP
1. Microchip BSP Introduction
Supported Microchip SAM (ARM Cortex-Mx Core) MCU is as following:
ARM Cortex-M23 Series
- saml10 | 3.3V Cortex-M23 with ultra low power
- saml11 | 3.3V Cortex-M23 with ultra low power and trust-zone
ARM Cortex-M0+ Series
- samc21 | 5V Cortex-M0+ with 2 CAN-FD support
- saml21 | 3.3V low power Cortex-M0+
- samd21 | 3.3V industrial level Cortex-M0+
ARM Cortex-M4 Series
- same54 | 3.3V 120MHz Cortex-M4F core with CAN-FD/USB/Ethernet support
ARM Cortex-M7 Series
- same70 | 3.3V 300MHz Cortex-M7 core with CAN-FD/High speed USB/Ethernet support
Directory description:
* applications:
	* user main function entrance,
	* driver example - like i2c, can, adc ...
	* application example
* board:
	* user board initialization
	* user driver adpater code, like console device, ethernet device
* bsp:
	* MCU BSP files - startup file, peripheral drivers, configuation headers and linker script
	* generated from start.atmel.com - DO NOT modify it
2. RT-Thread porting guide of Microchip SAM MCU
2.1 Configure project BSP on Atmel Start
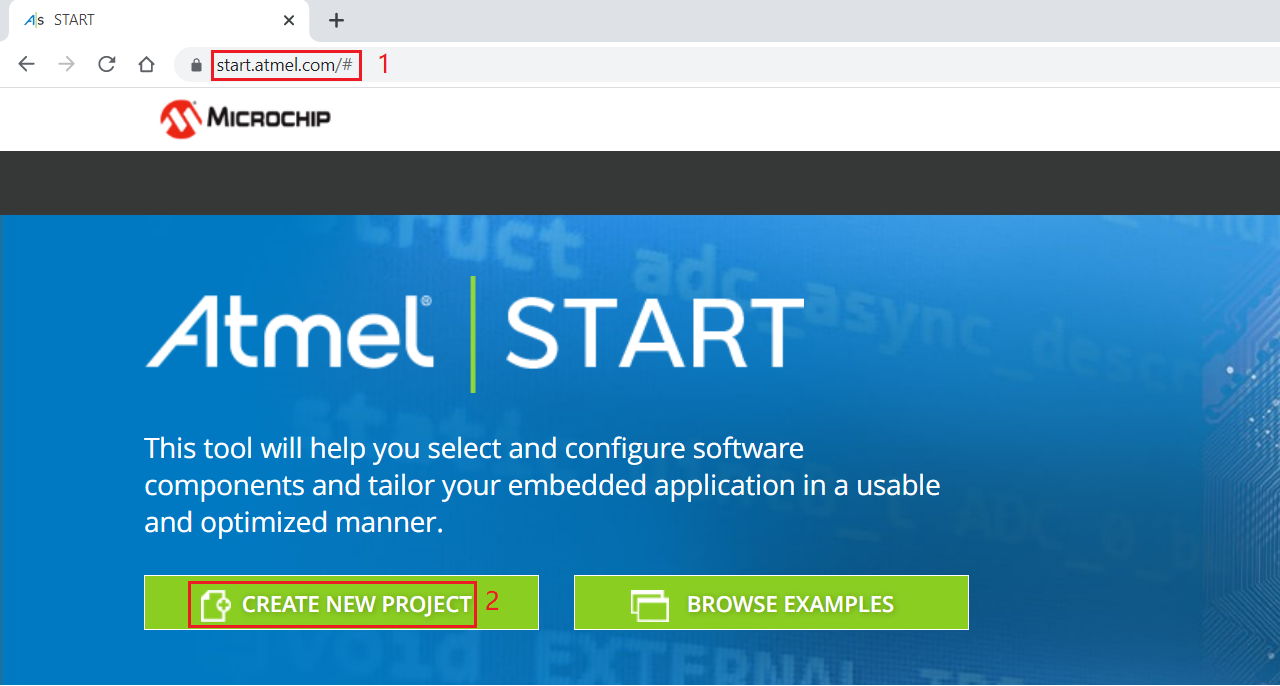
Visit https://start.atmel.com/# and click CREATE NEW PROJECT.
Input MCU part number and then select device, click CREATE NEW PROJECT.

Add STDIO and other driver/middleware to project.

Configure STDIO driver.

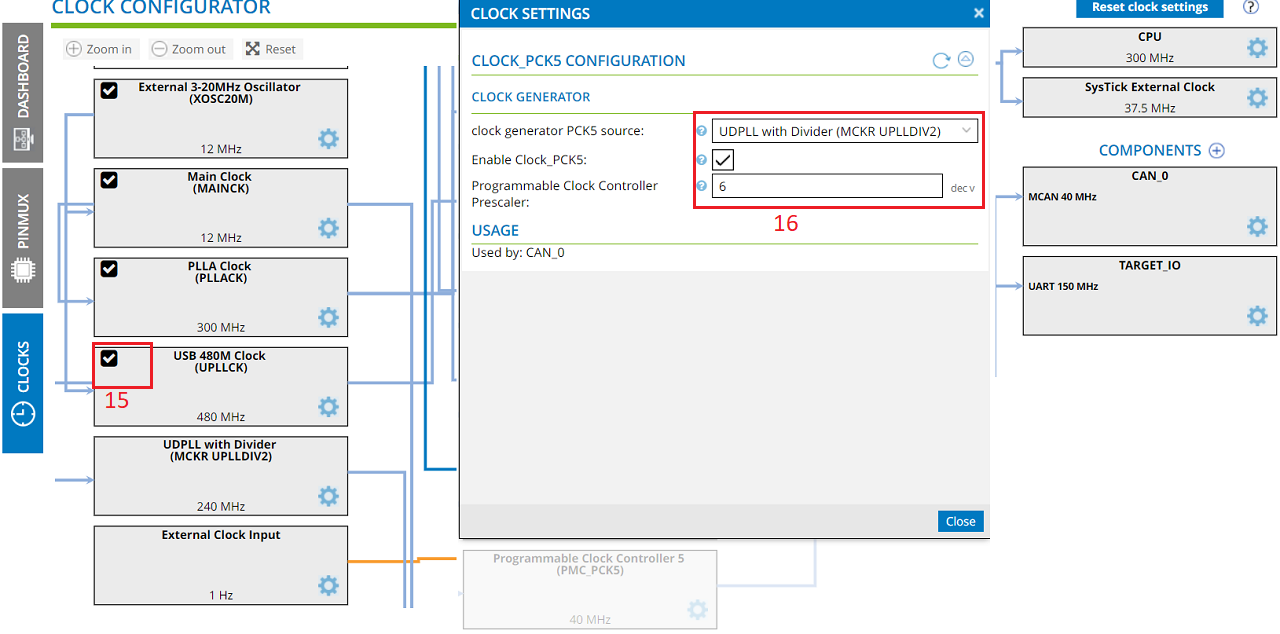
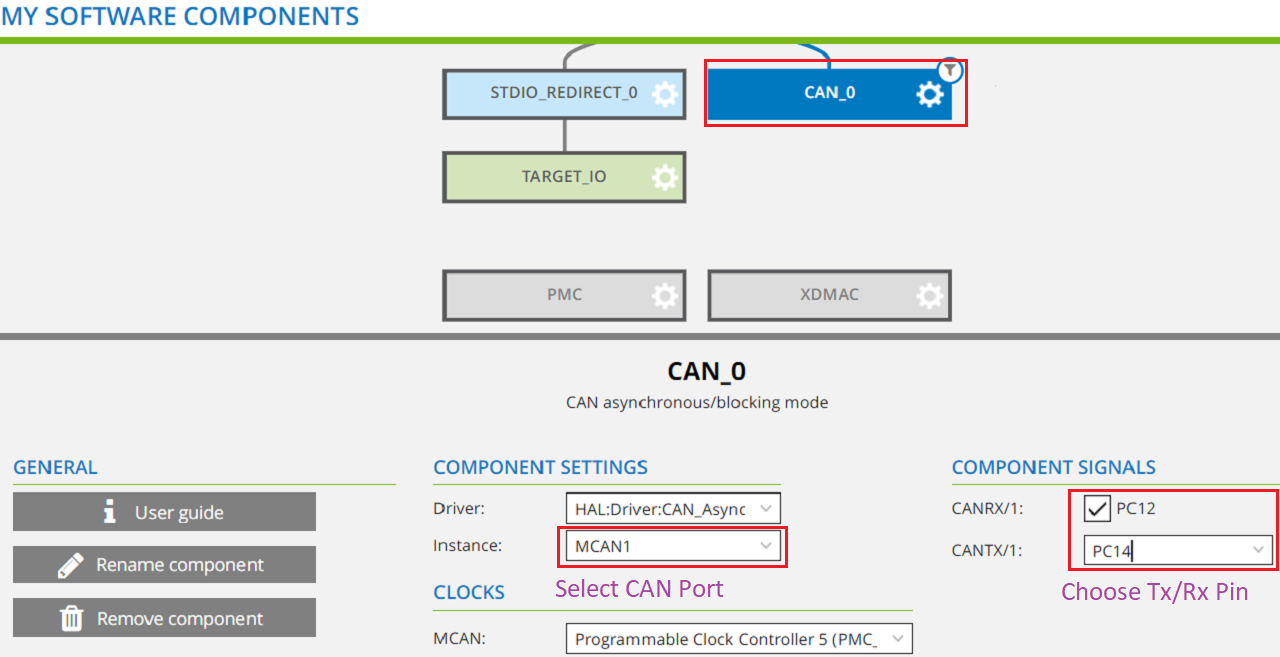
Configure CAN module clock.
Configure CAN module driver.


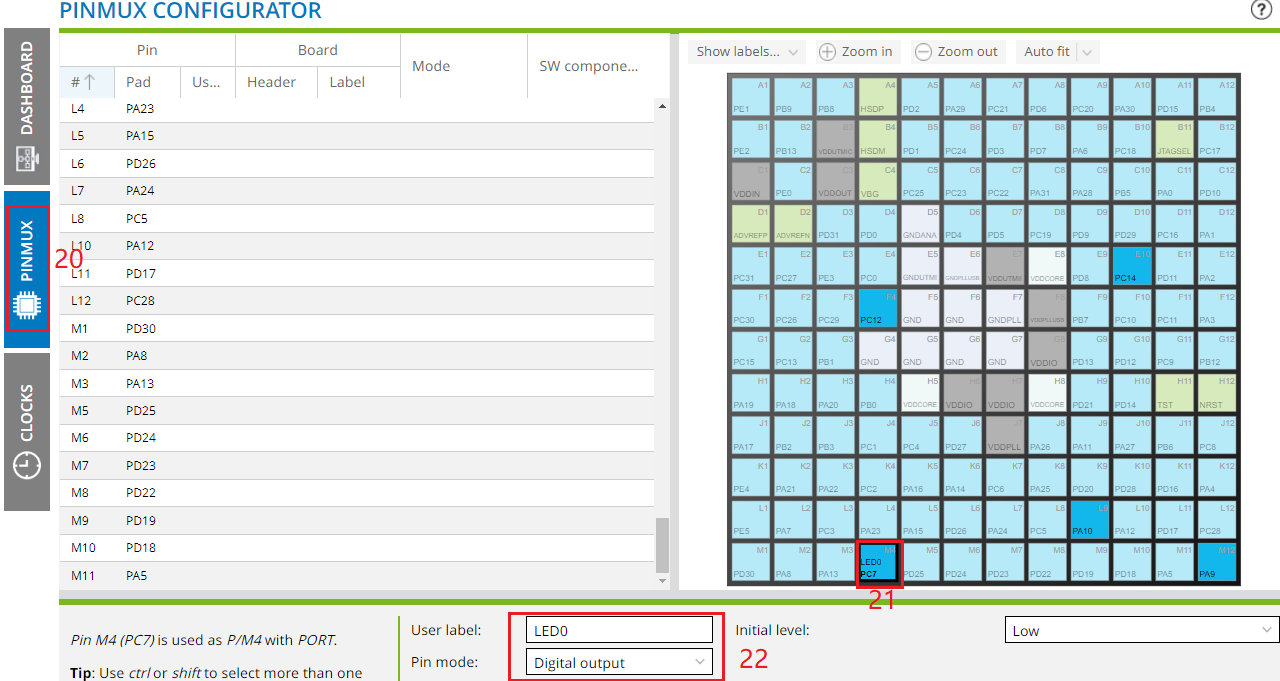
Add LED pin description.
Rename project.

Save project configuration.

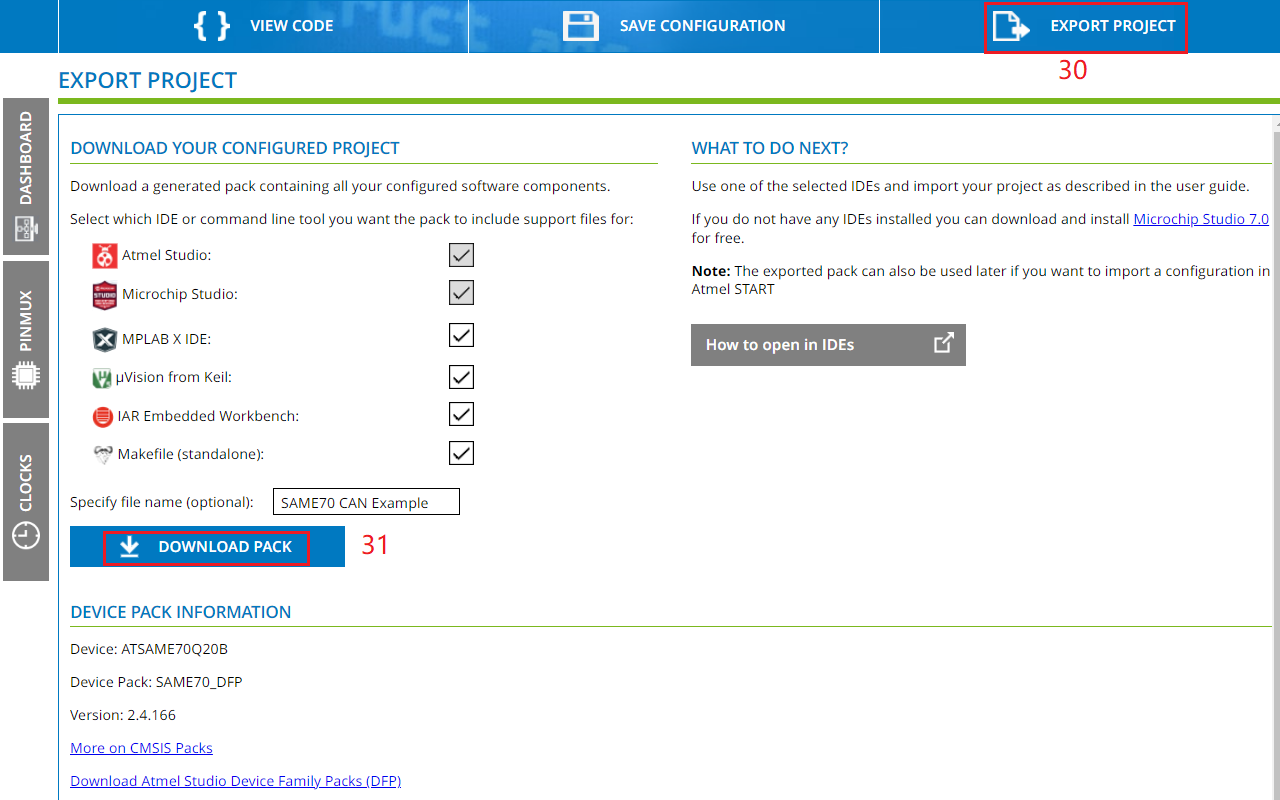
Export project source code.
2.2 Add project to RT-Thread source code
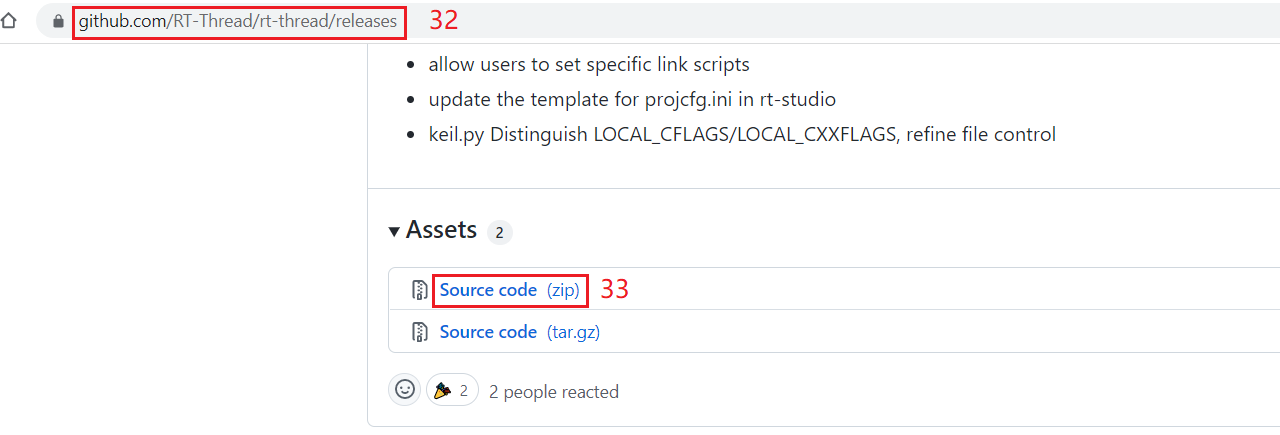
Link: https://github.com/RT-Thread/rt-thread and download RT souce code.
Unzip downloaded RT-Thread and SAME70 CAN Example

Enter rt-thread-xxx/bsp/microchip directory and copy same70 folder and rename it to same70q20.
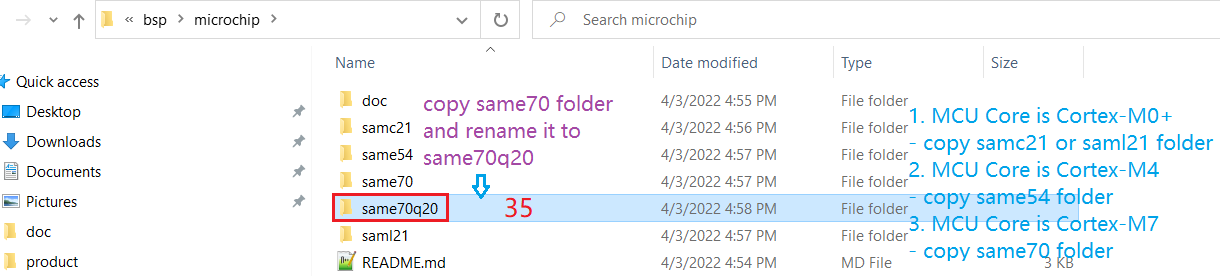
Enter same70q20 directory and remove all files except SConscript file.

Copy all files from SAME70 CAN Example to rt-thread-xxx/bsp/microchip/same70q20/bsp.

Modify rt-thread-xxx\bsp\microchip\same70q20\rtconfig.py.

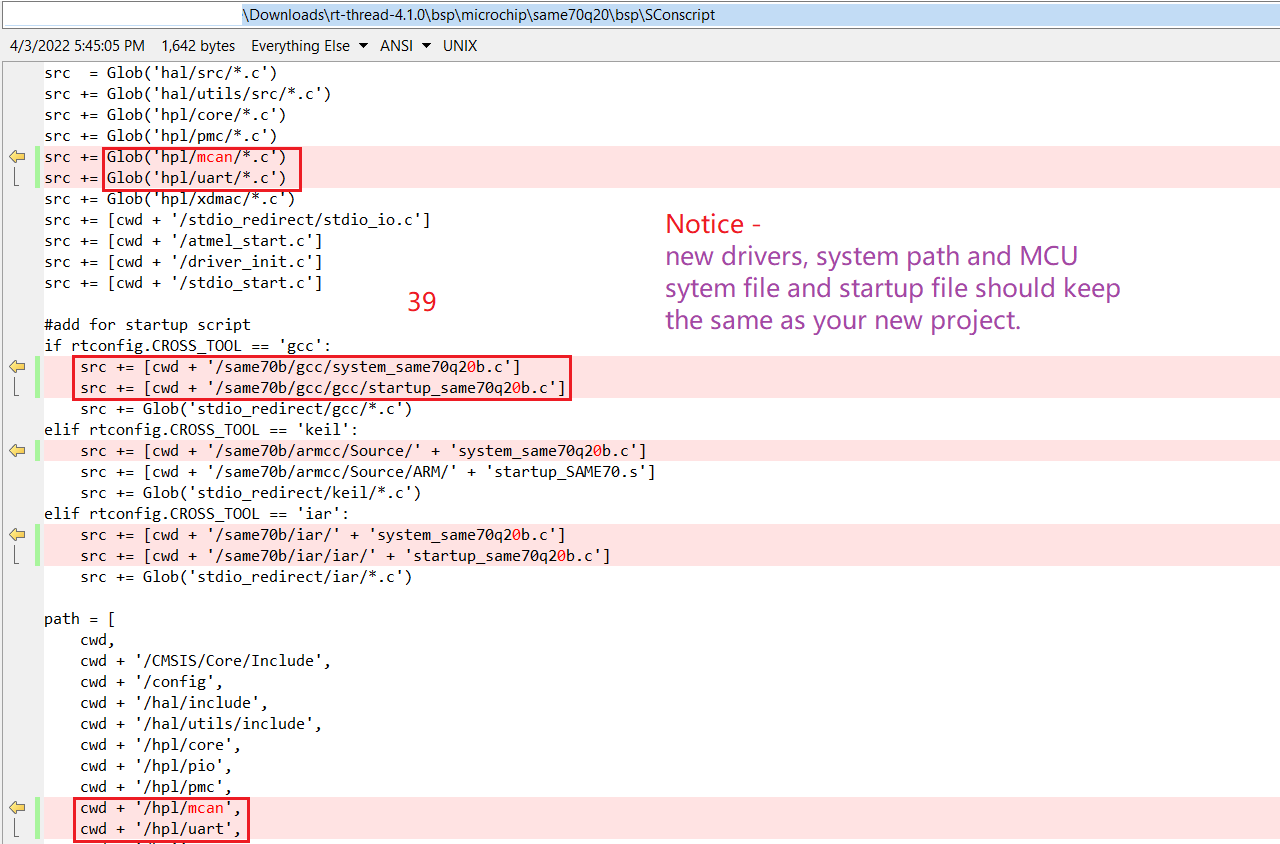
Modify rt-thread-xxx\bsp\microchip\same70q20\bsp\SConscript.
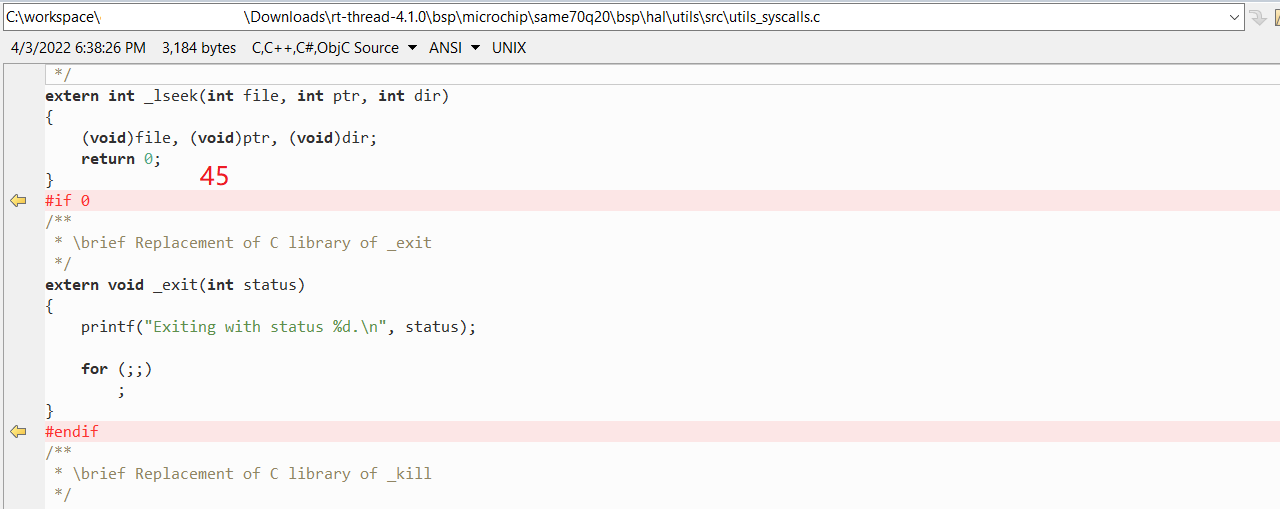
Modify rt-thread-xxx\bsp\microchip\same70q20\bsp\same70b\gcc\gcc\same70q20b_flash.ld.

Modify rt-thread-xxx\bsp\microchip\same70q20\bsp\same70b\gcc\gcc\startup_same70q20b.c.

Alright, now you can use RT-Thread env tools to compile the project.
2.3 Compile project with RT-Thread env tools
About RT-Thread env tools, click Here.
Download RT-Thread env tools https://www.rt-thread.org/download.html#download-rt-thread-env-tool

Unzip downloaded file and run env.exe.
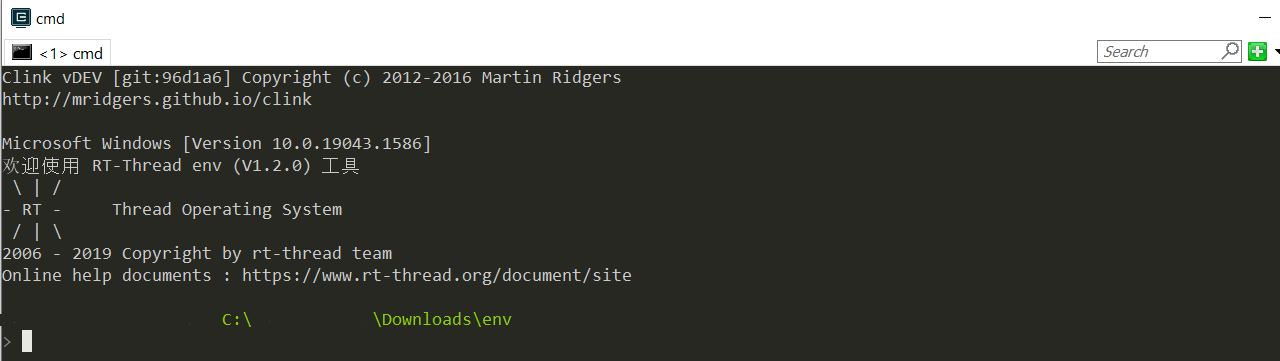
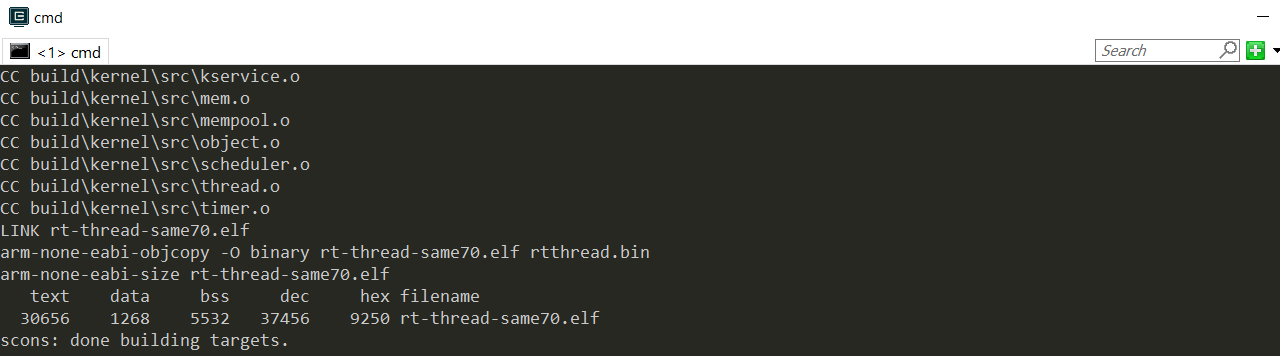
Enter your project directory and run scons command to compile it.

Compile error you may have and proposed solution.

Fix compiling error
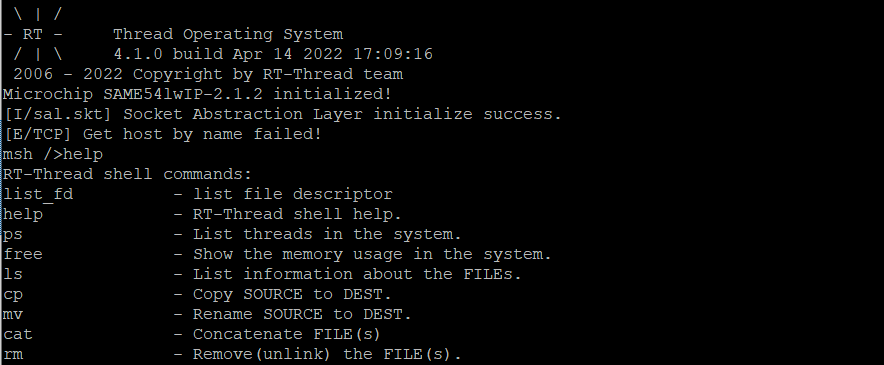
Compiling success
In the following chapter I will show you how to debug RT-Thread with Studio 7.
3. RT-Thread debugging with Microchip IDE
Link: https://www.microchip.com/en-us/tools-resources/develop/microchip-studio, download & install Microchip Studio 7.

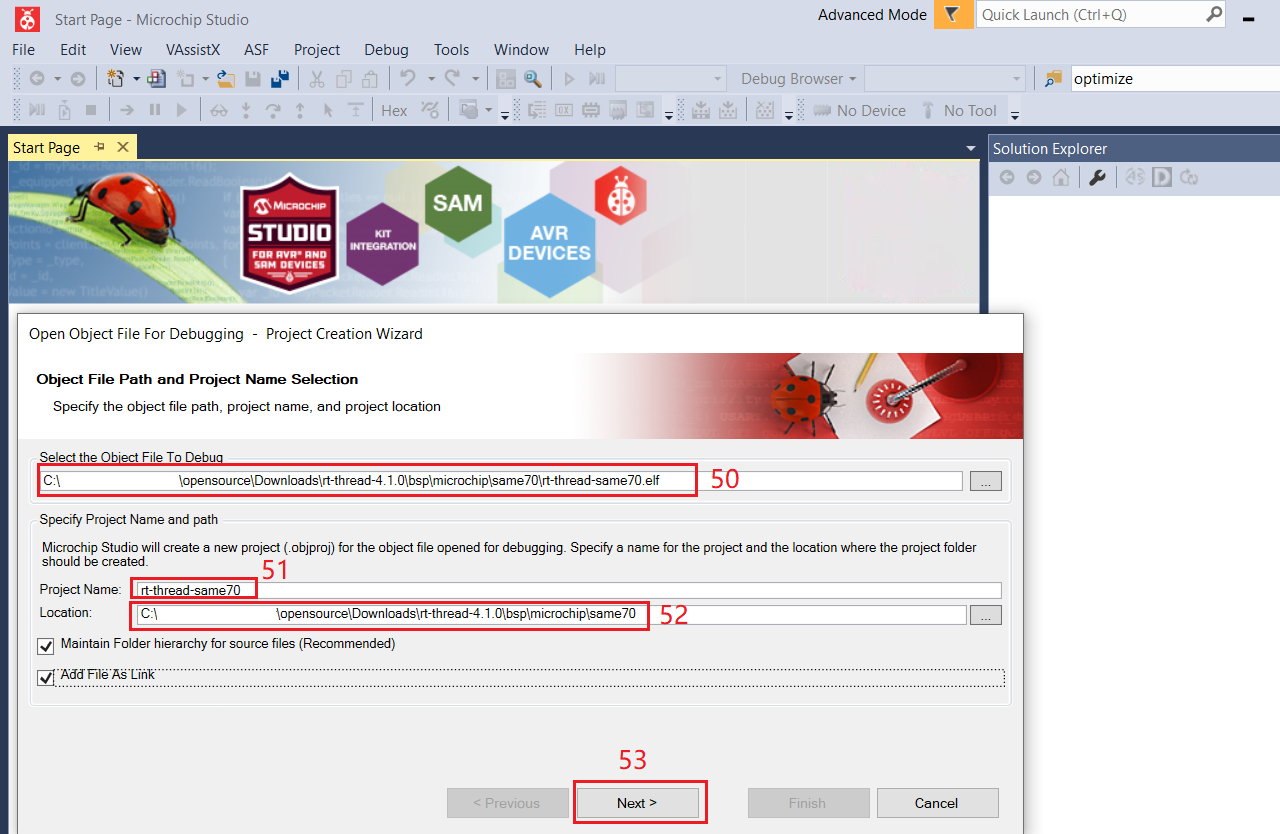
Open installed Microchip Studio 7 and open object file for debugging.

Choose object file, fill project name and select where to save this project.
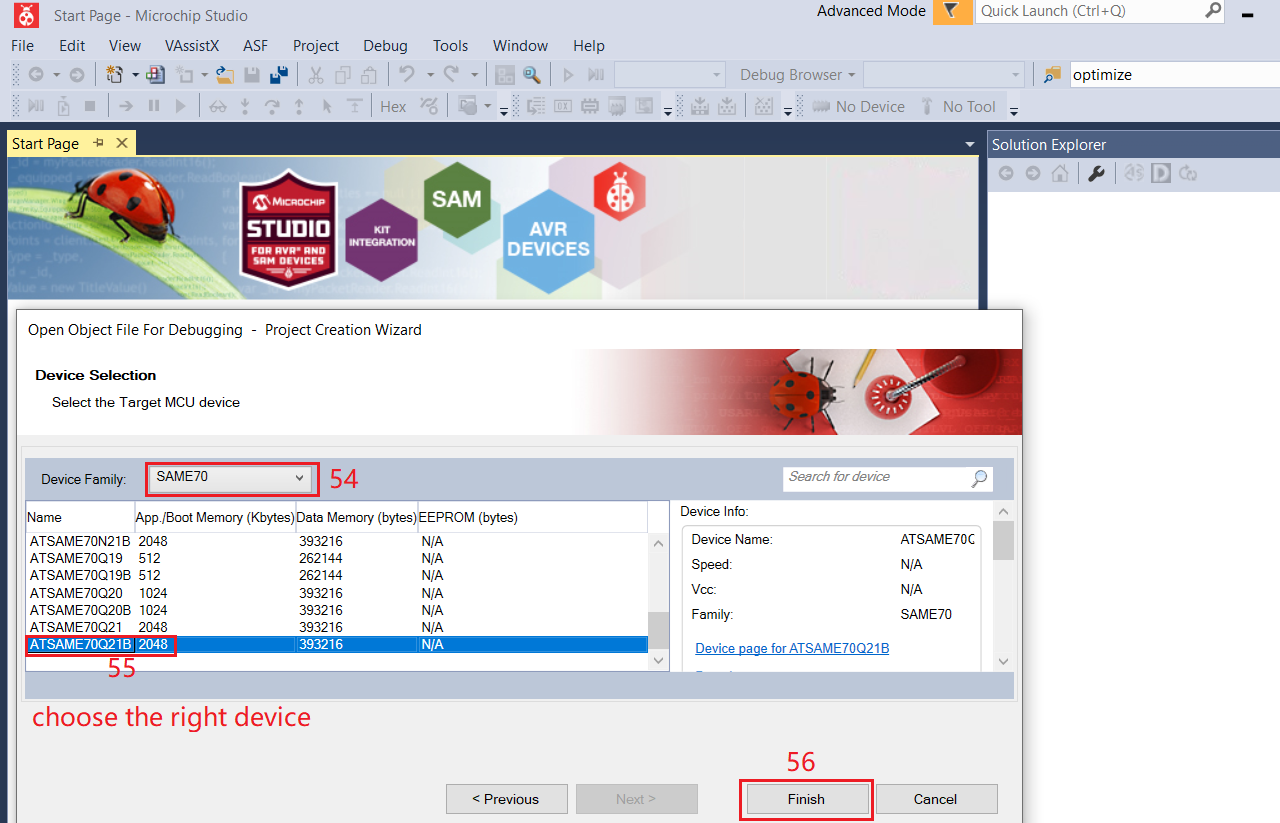
Select the right part number and complete object set up.
Object file import complete and you can see related files are linked to project.

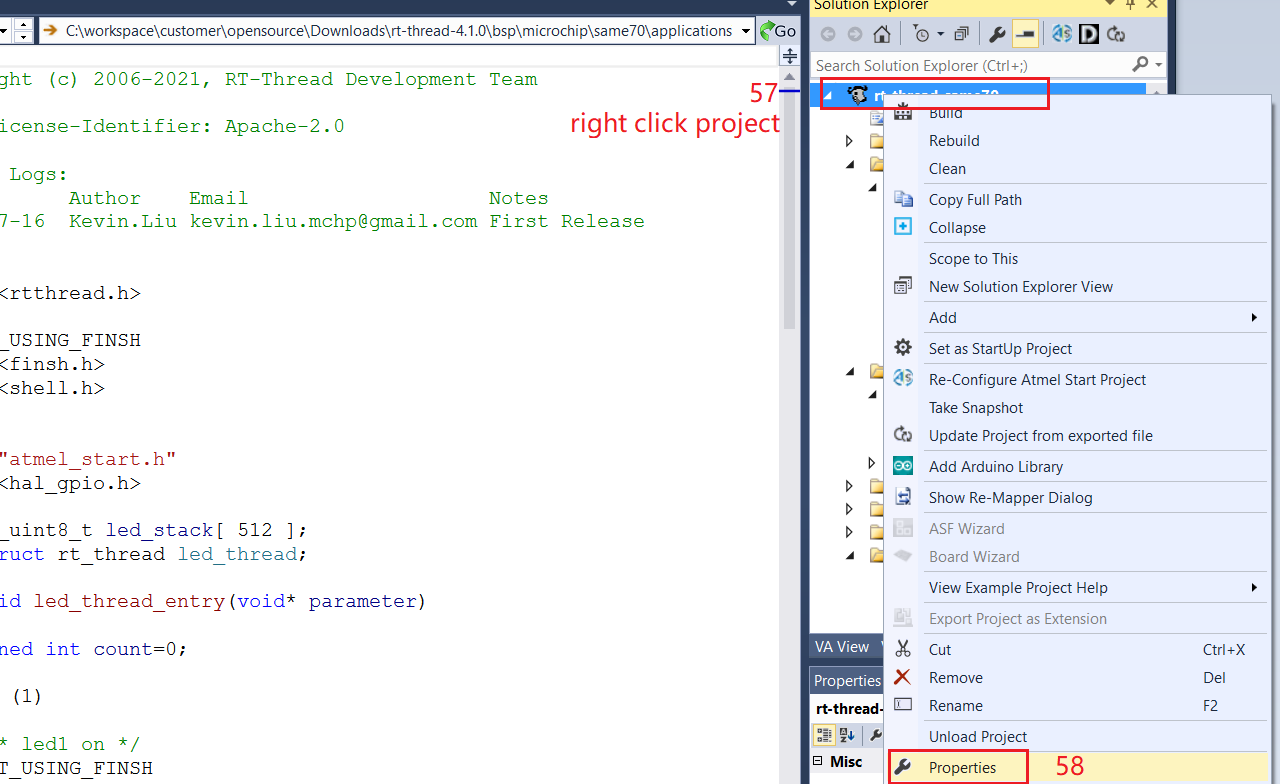
Right click the project and choose the debug tools in project propertities setting.
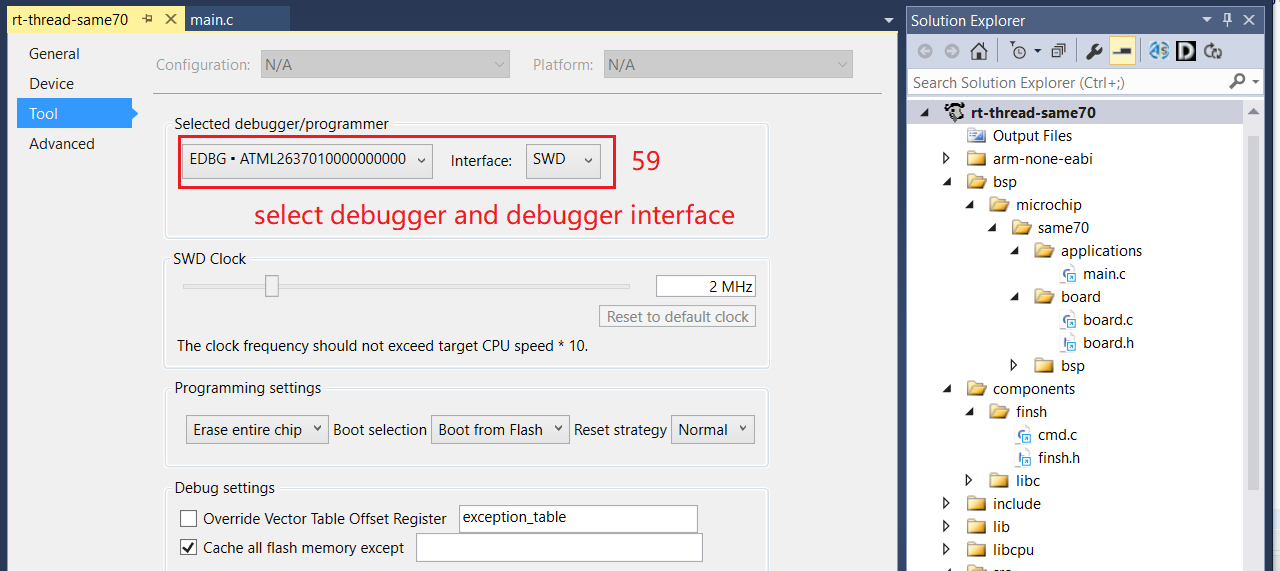
Choose debugger/programmer and debugger interface - SWD or JTGA.
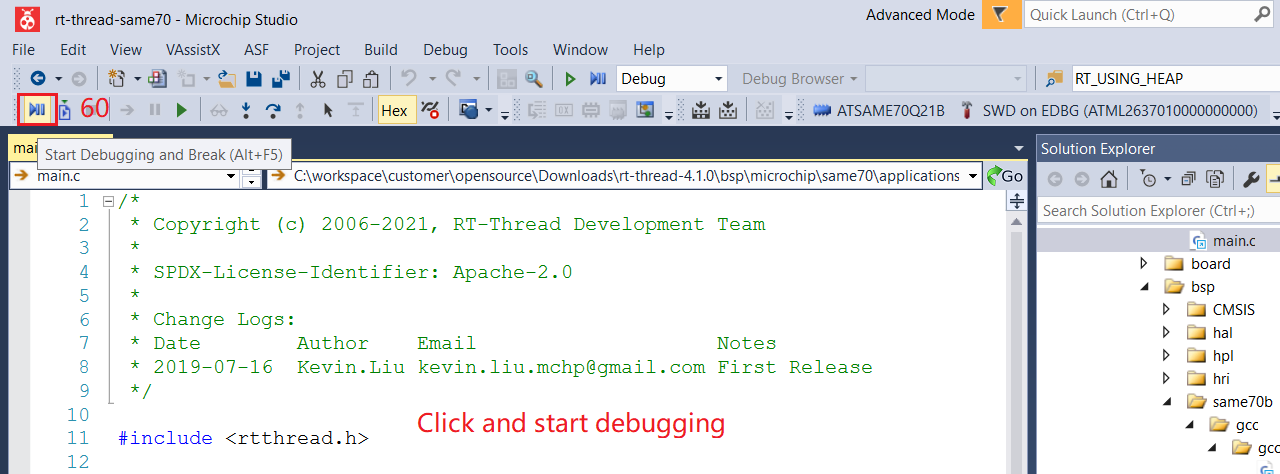
Press debugging button and enjoy your debugging journey.
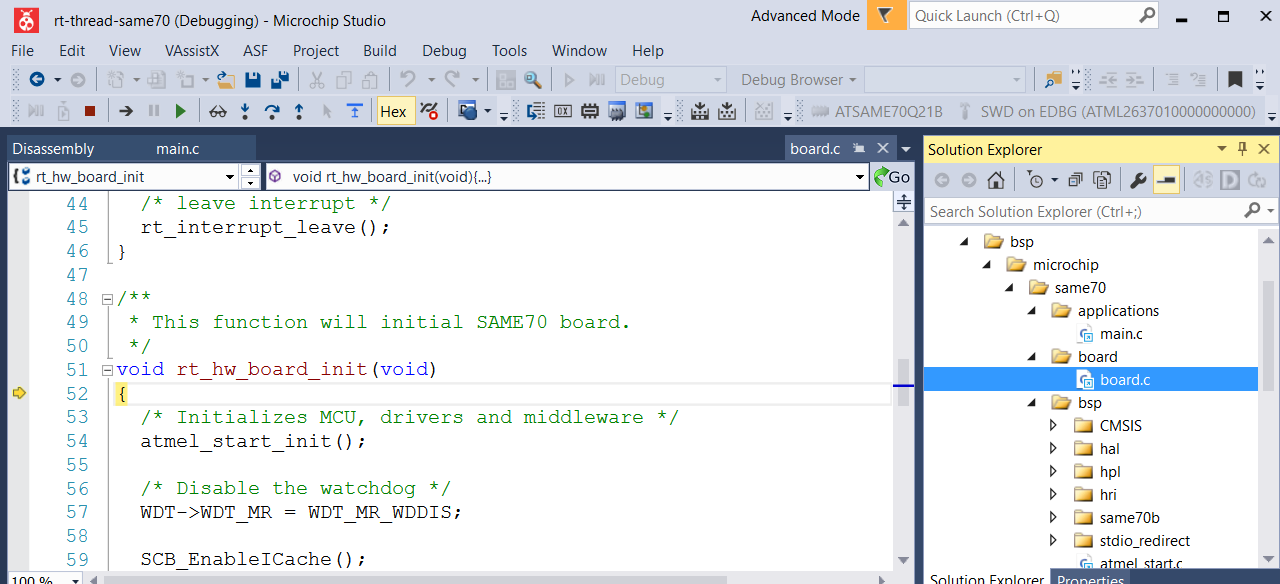
Debugging start and you can add breakpoint.
Debugging paused at breakpoint and you can monitor local variables at Watch window.
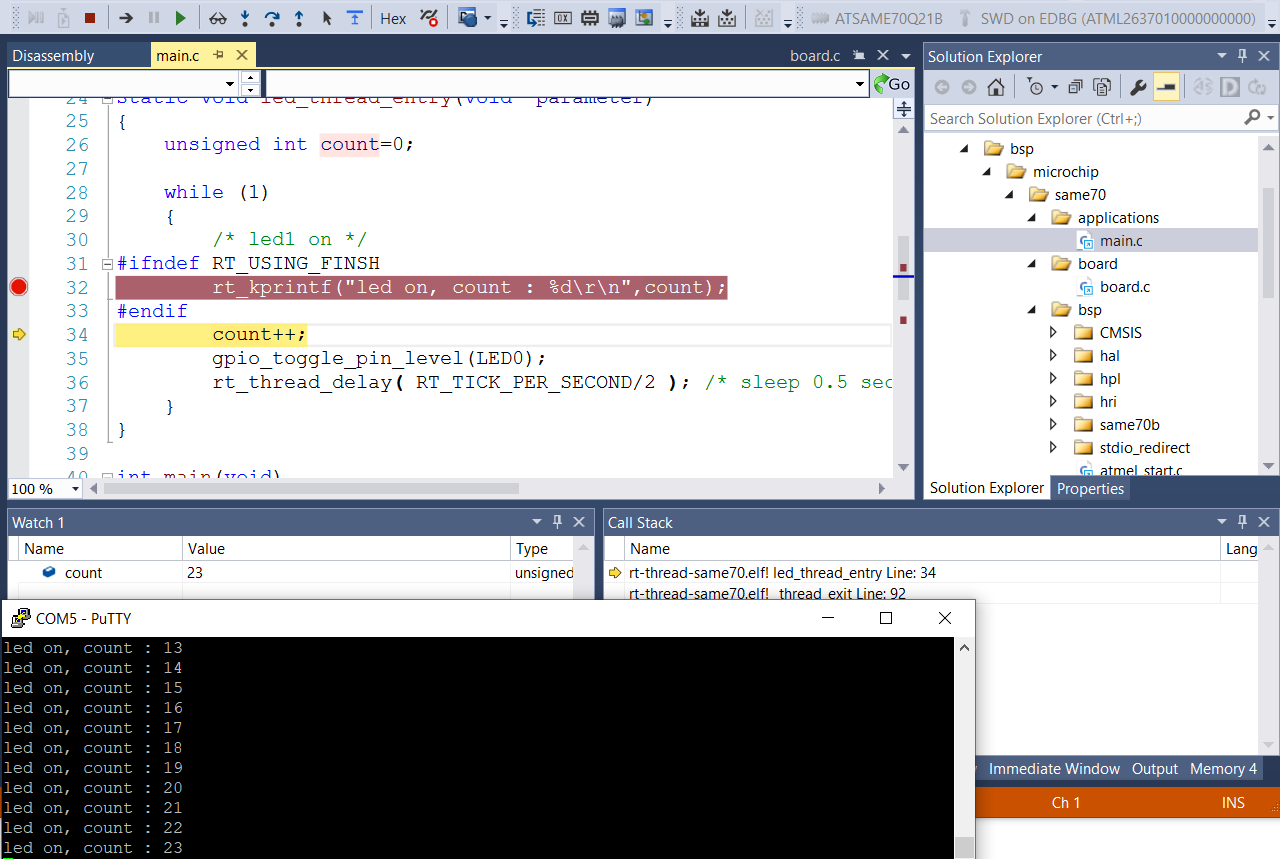
Debugging message output.
4. Reconfigure MCU BSP
Visit https://start.atmel.com/# and upload project configuration.
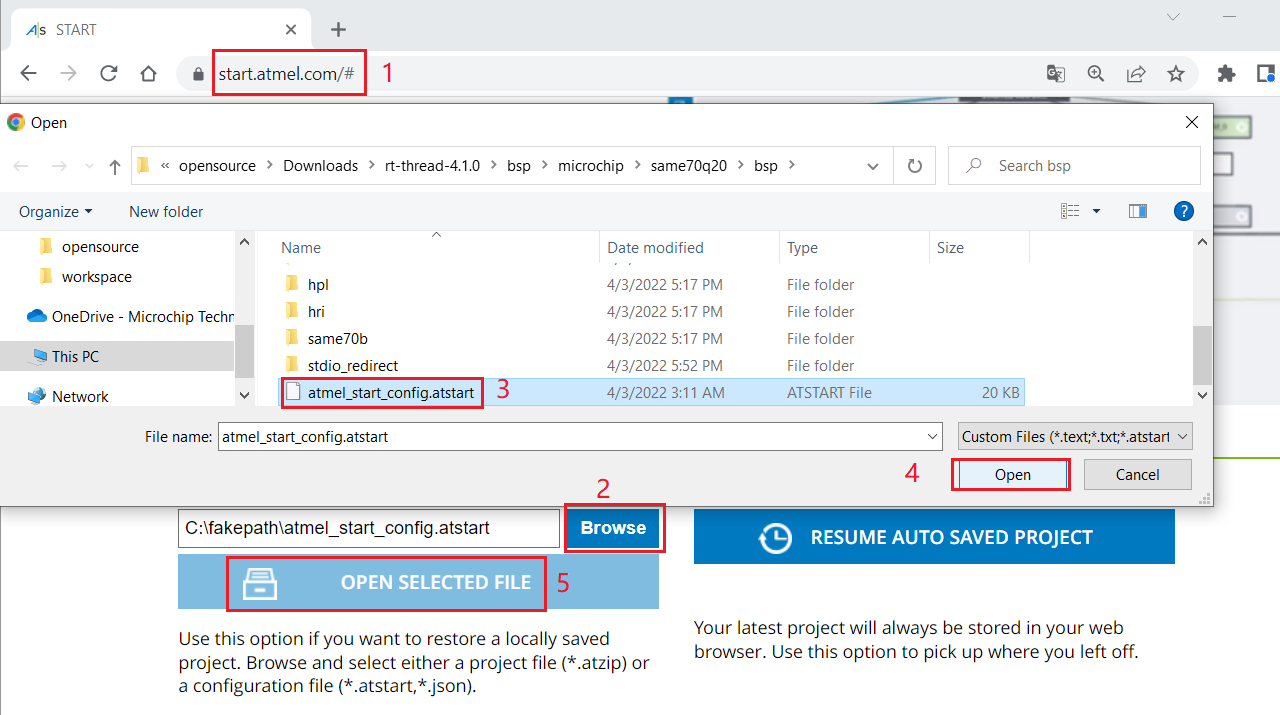
Now you can reconfigure your project.

5. Microchip SAM MCU BSP configuration and user guide
Please refer to ASF4 API Reference Manual for more details
5.1 SAMC2x/E5x/E70 CAN Driver
CAN driver configuration.

CAN driver user guide - see ASF4 API Reference Manual P121 for more details.
To be continued.
6. Contact Info
- Kevin Liu, email: kevin.liu.mchp@gmail.com
- luhuadong, email: luhuadong@163.com